Architecture, IT, CAD, for a well know Architecture Practice making top buildings. We use Microstation, Revit, all the usual Adobe Products, PCs (not Macs although we would quite like to change back), 2.5 offices, and a great working environment.
Showing posts with label Revit. Show all posts
Showing posts with label Revit. Show all posts
Thursday, 14 July 2011
Tuesday, 19 October 2010
Aquiring Coodinates in Revit - Its easy when you know how

Revit has a strange way of using a coordinate system. Traditional CAD (AutoCAD and Microstation) allows the use of Auxillary coordinate systems so you can have a number of different oring points, North angles and relative positions.
Revit is different. With Revit, models should always be drawn at the centre of the file near the world 0,0 point. This can be found by viewing the default "Site" view in a Revit file. The site view has the survey 0,0 and the world 0,0 turned on so they can be viewed.
To add a true coodinate system on to the Revit model, first link a DWG (or Revit file) that contains a survey point or grid. if you are starting to work with a project that already has a grid in the correct place, use the grid file as this contains the key monument points for the whole project.
When you link the DWG survey file or grid file, position it center to center so that the grid appears near the survey and world 0,0 points. It is likey that the grid file will appear at an agle too.
Now the important bit. Make sure that you only move the linked CAD file and not the model file itself. With other CAD systems you usually work the other way round and you never move the attached grid file.
Rotate the linked file to the correct angle so that the grid runs left to right and up to down correctly. Now position the grid in exactly the right position by moving the linked file. Once the linked file is in the correct position and the correct angle you are now ready to aquire the coordinates.
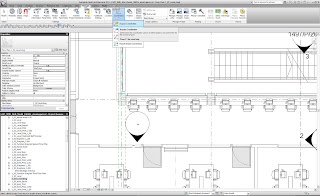
click on Manage (from within the Revit menus) then Coordinates then Aquire Coordinates. Now click on the linked CAD file. This will add the coordinate system to the Revit file and you will now be able to link other revit files and CAD files using shared coordinates (instead of center to center etc) so that the files appear in exactly the same location.
Friday, 21 May 2010
REVIT
Getting the right orientation for Curtain Wall Panels
1. Place a curtain wall from right to left and the exterior is above
2. Place a curtain wall from left to right and the exterior is below
3. If you place a panel in these curtain walls you will end up with the exterior of your panel in the right place (on the side that shows the up and down arrows for flipping the orientatation
4. If you place a curtain wall by face on to a Mass, the panel will be mirrored about the centre. Therefore everything that is on the left of the panel will be on the right.
5. If you flip the wall so that the exterior and interior swap places, the panel will be correct. However you will then have to rotate the wall by 180 so that the exterior is again on the exterior. The face will no longer be updated to the mass
6. Drawing the wall normally (without putting it on to the face of the mass) makes the curtain wall panel correct and the exterior is identical to the exterior of the family.
I am sure there is a solutiont to this but I have not been able to find it. I am guessing that the solution is within the panel family that we have created.
Subscribe to:
Posts (Atom)